

From Blank to Bling: Your Guide to Custom Cuff Bracelet Creation
Why Making Your Own Personalized Cuff Bracelet is Worth It

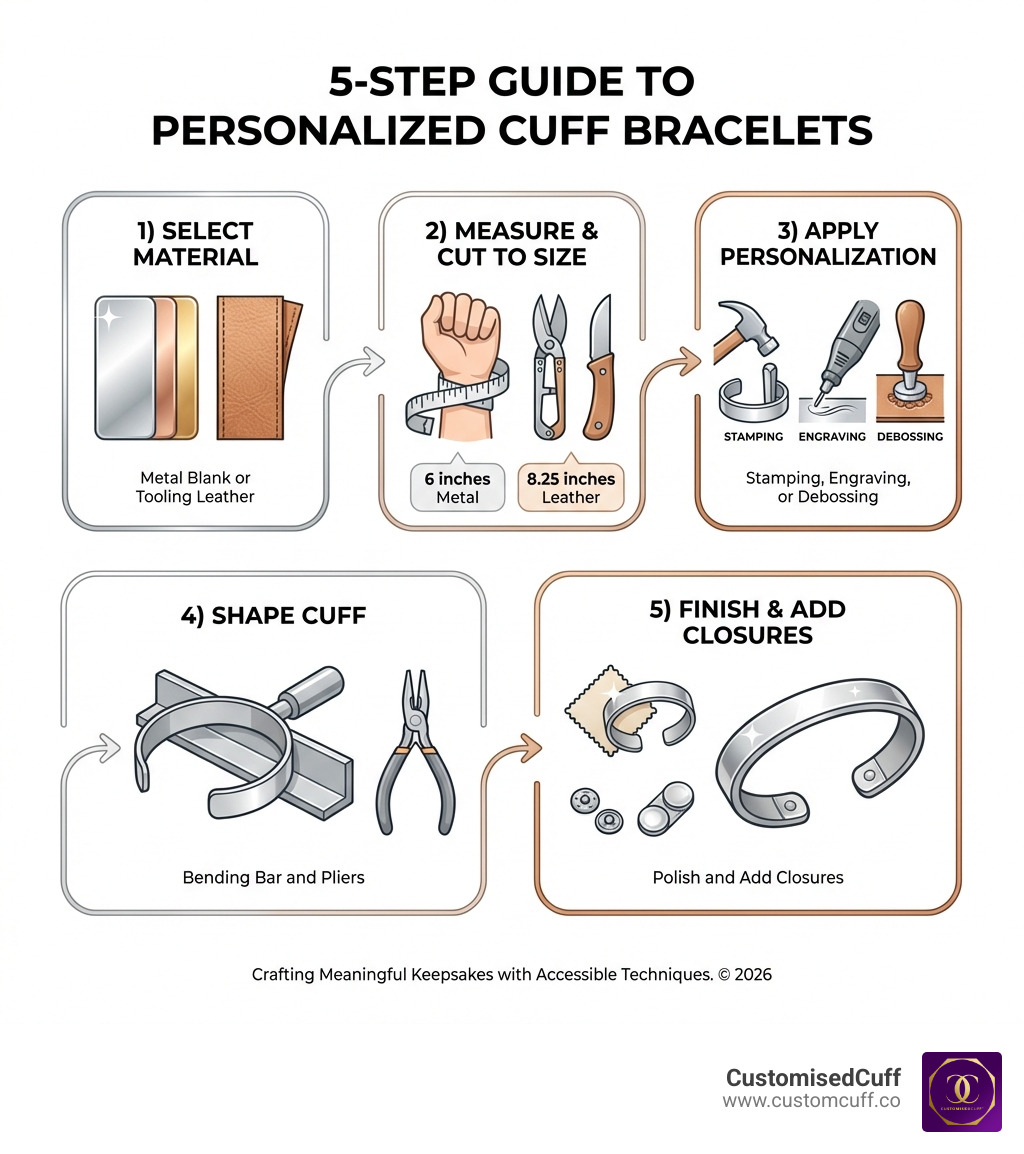
How to make personalized cuff bracelets in five straightforward steps:
- Choose your material - Select metal blanks (aluminum, copper, or stainless steel) or tooling leather as your base
- Measure and cut - Measure your wrist and cut the blank to size (typically 6 inches for metal, 8.25 inches for leather)
- Personalize - Apply your custom design using metal stamping, Cricut engraving, or leather debossing
- Shape the cuff - Bend the blank into a bracelet shape using a bending bar and pliers
- Finish and secure - Polish the surface, add closures (snaps or magnetic clasps), and highlight any stamped text with enamel
Creating personalized cuff bracelets at home transforms simple metal blanks or leather strips into meaningful keepsakes that capture what matters most. Whether you're commemorating a special date, engraving a loved one's handwriting, or designing a zodiac-inspired piece, the process combines accessible crafting techniques with deeply personal touches.
The beauty of DIY cuff bracelets lies in their flexibility. Metal cuffs made from 18-20 gauge aluminum or copper offer durability and a professional finish, while leather cuffs provide a softer, more casual aesthetic. Both materials accept personalization beautifully—from traditional hand stamping to modern Cricut engraving—allowing you to create something truly one-of-a-kind.
I'm Suchi Jain Saxena, founder of CustomCuff.co, where we've helped customers in over 70 countries create personalized jewelry that captures life's precious moments. Through years of experience in how to make personalized cuff bracelets and scaling a jewelry business featured in Business Insider and at New York Fashion Week, I've learned what makes these pieces both beautiful and lasting.
How to make personalized cuff bracelets word list:
Choosing Your Canvas: Materials and Types
Before we dive into the hammer-swinging and leather-cutting, we need to talk about the "canvas." In custom cuff bracelet designs, your choice of material dictates not just the look, but the longevity and "feel" of the piece.
Metal Blanks: The Gold Standard
When most people think of a cuff, they think of metal. It's sleek, adjustable, and timeless.
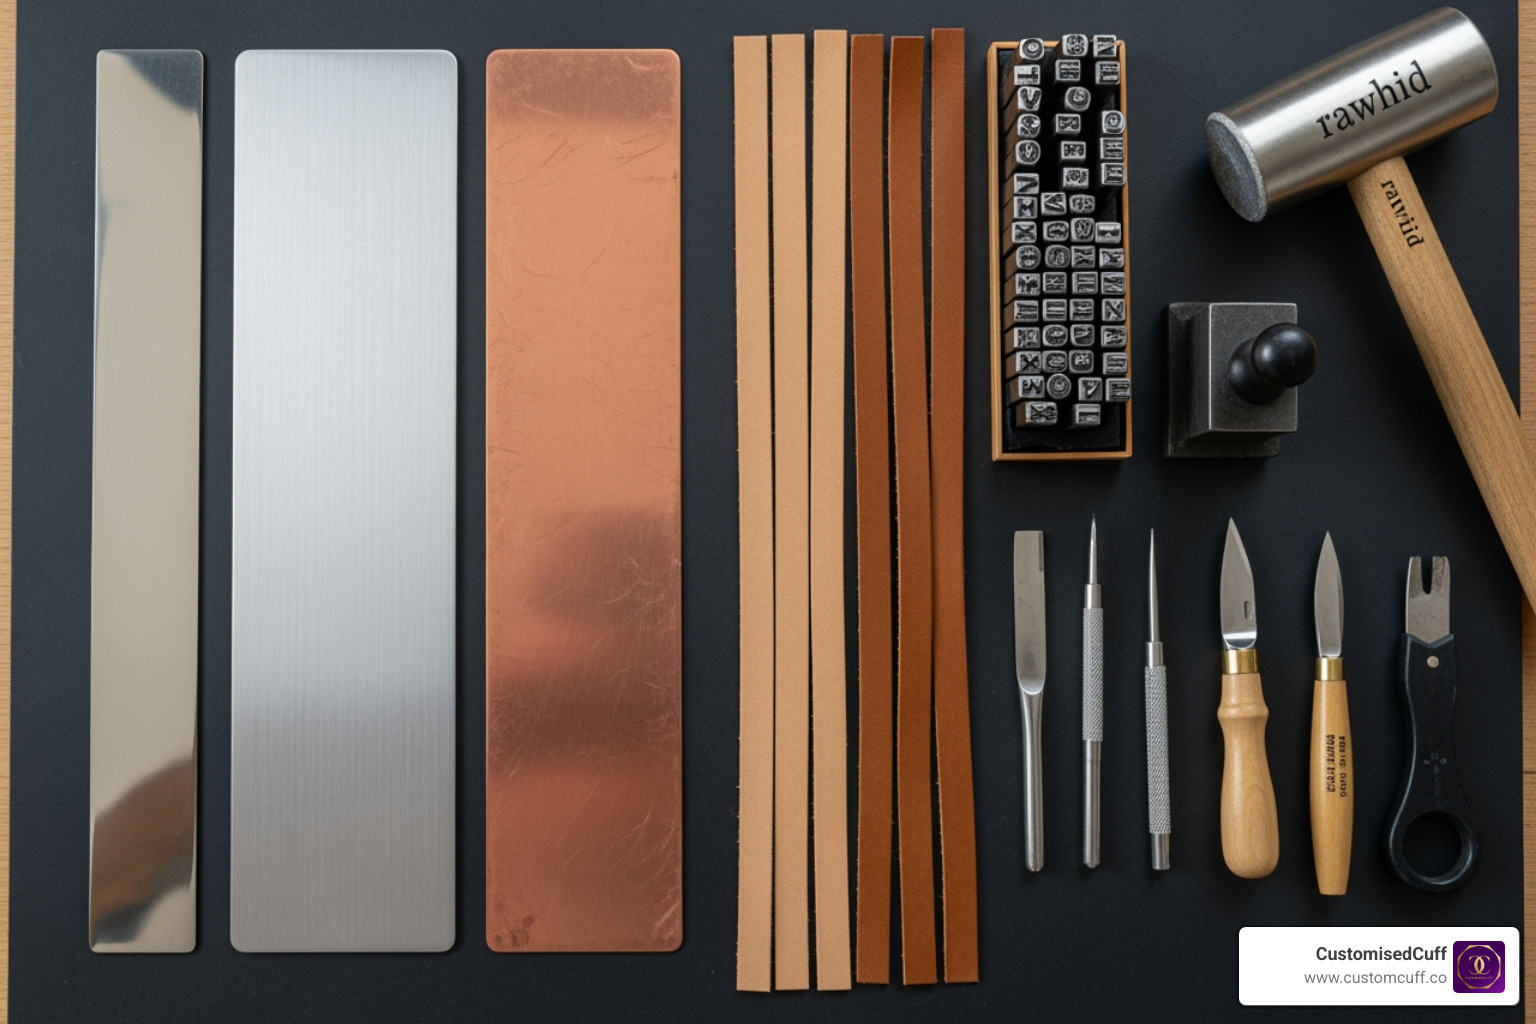
- Stainless Steel: This is our personal favorite. It is incredibly durable, will not tarnish, and maintains its color for a lifetime. Our stainless steel cuffs usually measure 6 inches by 1/4 inch.
- Aluminum: A fantastic choice for beginners. It's softer than steel, meaning it's easier to stamp and bend. Plus, it's lightweight!
- Copper and Brass: These provide a beautiful, warm aesthetic but do require more maintenance as they naturally oxidize over time.
For a professional-grade cuff, we recommend using 18-gauge or 20-gauge metal. If you go thinner than 22-gauge, the bracelet might feel flimsy and lose its shape too easily.
Leather: The Rugged Alternative
Leather cuffs offer a completely different vibe—earthy, comfortable, and perfect for stacking.
- Tooling Leather: If you want to deboss or stamp designs, you need "Veg-Tan" tooling leather. This hasn't been sealed yet, allowing it to take impressions.
- Weight Matters: We suggest a 6-7 oz weight leather. It’s thick enough to feel like a "statement" but flexible enough to wrap around the wrist.
Whether you are using metal or leather, the goal is the same: creating a personalized gift idea custom cuff that tells a story.
For those interested specifically in the leather route, this DIY leather cuff guide provides excellent foundational knowledge.
How to Make Personalized Cuff Bracelets: The Preparation Phase
Preparation is where the magic (and the math) happens. The most common mistake beginners make is skipping the measurement phase and ending up with a "one-size-fits-nobody" bracelet.
The Sizing Table: Metal vs. Leather
| Wrist Size | Metal Blank Length | Leather Strip Length |
|---|---|---|
| Small (5" - 6") | 5.5 inches | 7.75 inches |
| Medium (6" - 7") | 6.0 inches | 8.25 inches |
| Large (7" - 8") | 6.5 inches | 9.0 inches |
Common Preparation Mistakes to Avoid
- Forgetting the "Gap": Metal cuffs aren't meant to meet at the ends. You need a gap (usually about 1 inch) to slide the cuff onto your wrist.
- Ignoring the Film: Many aluminum blanks come with a blue protective film. If you stamp through it, your letters won't be as crisp. Peel it off first!
- Sharp Edges: Always file down the corners of your metal blanks. A beautiful bracelet shouldn't double as a weapon.
Essential Tools for How to Make Personalized Cuff Bracelets
If you're serious about learning how to make personalized cuff bracelets, you’ll need a few specialized items. Don't worry; you don't need a full blacksmith's forge!
For Metal Stamping:
- Steel Stamping Block: This provides the hard, flat surface needed to get a clean impression.
- Metal Stamp Set: Usually letters and numbers.
- Brass Hammer: Brass is softer than steel stamps, so it won't damage your tools when you strike them.
- Stamp Straight Tape: This helps you align your letters so your "Inspiration" doesn't look like it's sliding off the edge of the world.
For Modern Engraving:
- Cricut Maker: Our go-to for high-precision designs.
- Engraving Tip: Part of the QuickSwap family for the Cricut Maker.
- Strong Grip Mat: To keep that metal from moving an inch.
For Leather Crafting:
- Rotary Cutter and Mat: For those perfectly straight edges.
- Cricut Debossing Tool: If you want to use technology to create deep, beautiful impressions in leather. You can find more details in this Cricut debossing guide.
- Snap Setter Jig: Essential for adding those professional Line 24 snaps.
For a full breakdown of what you might need for the leather side of things, check out this resource on leather tools and supplies.
Measuring for the Perfect Fit
Measuring is simple: take a cloth measuring tape and wrap it snugly (but not tightly) around the part of the wrist where the bracelet will sit.
- For Metal: Subtract 1 inch from your wrist measurement to find your blank length. Metal is adjustable, so you can gently squeeze or pull the cuff for a "perfect" fit.
- For Leather: Add about 1 to 1.5 inches to your wrist measurement. Leather doesn't "gap" like metal; it overlaps at the snaps, so you need that extra length for the closure.
Step-by-Step: Crafting Your Custom Metal or Leather Cuff
Now for the fun part! Let's get into the actual creation. Whether you're going for "Blank to Bling" or "Leather to Luxe," these steps will guide you.
Technique 1: Traditional Metal Stamping
- Secure the Blank: Tape your blank to the steel block using Stamp Straight Tape. This creates a "ledge" for your stamps to sit against.
- Find the Center: Mark the midpoint of your word and the midpoint of the blank. Work from the center outward to ensure the design is balanced.
- The "One-Hit" Rule: Hold your stamp at a 90-degree angle. Strike it once with medium force. If you hesitate or hit it twice, you might get a "ghostly" double-imprint.
- Highlighting: Use stamp enamel or a permanent marker to fill in the letters. Let it sit for 20 seconds, then wipe away the excess with a paper towel and a dab of rubbing alcohol.
Technique 2: Cricut Engraving (The Modern Way)
If you want something more intricate—like custom-engraved-cuff-bracelets-that-speak-louder-than-words—the Cricut is your best friend.
- Design Space: Create your design using "Single Line" fonts. This ensures the machine engraves a solid line rather than just an outline.
- Prepare the Mat: Tape all four sides of your metal blank to a Strong Grip Mat.
- Star Wheels: Move the white star wheels on your Cricut all the way to the right so they don't mar the metal surface.
- Engrave: Select "Aluminum Sheets" as your material and let the machine do its thing!
Technique 3: The Leather Statement
- Dampen the Leather: Lightly wipe your tooling leather with a damp paper towel. This "opens" the fibers so they take the debossing design more deeply.
- Deboss or Stamp: Use your Cricut Debossing Tool or manual stamps to apply your design.
- Add Flair: This is where you can add decorative elements. Think spikes, beads, or even crystals. If you're feeling a bit "rock and roll," this leather spiked cuff tutorial is a must-read.
Shaping, Closures, and Finishing
A flat piece of metal or leather is just a strip; the shaping is what makes it a custom cuff bracelet.
Shaping Metal: We recommend using a Bracelet Bending Bar. You simply place one end of the blank in the notch and bend it around the curve. Repeat for the other side. If the metal feels too hard (this happens with work-hardening), you can "anneal" it by heating it with a torch and quenching it in water to soften it back up.
Closures for Leather:
- Snaps: Line 24 snaps are the industry standard. They require a hole punch and a setter tool.
- Magnetic Clasps: Great for a modern look. These usually require jewelry glue to secure the leather ends into the clasp.
- Button Loops: A classic DIY look where you tie a loop in the leather cord to fit over a decorative button.
For more on how to finish your leather pieces, see these leather bracelet closure options.
Caring for Your Custom Creations
You've put in the work, now let's make sure it lasts!
- Metal Cuffs: Our stainless steel is waterproof and tarnish-resistant, but it can still pick up fingerprints. A quick wipe with a microfiber polishing cloth will bring back that "day one" shine.
- Leather Cuffs: Leather is skin! It needs moisture. Use a specialized leather conditioner every few months to prevent cracking. Most importantly, keep leather away from water. If it gets soaked, it can become brittle as it dries.
- Storage: Store your cuffs in a cool, dry place. If you have multiple metal cuffs, keep them in separate soft pouches to prevent them from scratching each other.
For a deep dive into preservation, read the ultimate leather care guide.
Frequently Asked Questions about Personalized Cuffs
What is the best metal gauge for a durable cuff?
For a sturdy, professional feel, 18-gauge or 20-gauge is best. 18-gauge is thicker and harder to bend but holds its shape incredibly well. 20-gauge is a happy medium—durable but easy enough for a beginner to shape. Avoid 22-gauge or higher unless you're making very delicate, dainty pieces.
Can I use a Cricut to engrave stainless steel?
Technically, the Cricut Engraving Tool is designed for softer metals like aluminum, copper, and brass. While some crafters have had success with very thin stainless steel, it can dull your engraving tip quickly. We recommend sticking to aluminum blanks for Cricut projects or choosing a professional engraving service for stainless steel. You can find the official Cricut engraving tool info here.
How do I prevent leather cuffs from cracking?
Cracking is usually caused by the leather drying out. Always use Veg-Tan tooling leather (6-7 oz) for the best results, and apply a leather conditioner immediately after you finish your project. Avoid wearing your leather cuff in the shower or pool, as the cycle of wetting and drying strips away the natural oils.
Conclusion
Learning how to make personalized cuff bracelets is more than just a craft—it's a way to wear your heart on your sleeve (literally). From the industrial chic of a stamped aluminum cuff to the sentimental warmth of a personalized leather phrase bracelet, the possibilities are endless.
At CustomCuff, we believe that the best jewelry tells a story. Whether you are crafting these as a therapeutic hobby, starting a small business, or making a personalized gift for a loved one, the "imperfections" of a handmade piece are often what make it most beautiful.
If you're not quite ready to pick up the hammer yourself, or if you're looking for that ultra-precise finish—like a star map of the night you met or a perfect engraving of a grandmother's handwriting—we're here to help. We've mastered the art of "Bling" so you can focus on the "Meaning."
Happy crafting, and may your cuffs always be as unique as the stories they tell!